Do you want to add Google Analytics to WordPress without a plugin? Then you don’t need to look out for any other article as your search is over now.
In this particular article, I’m going to tell you how you can connect Google Analytics to your WordPress website or blog step-by-step.
But, first of all, Let us discuss a little bit about what is Google Analytics and its benefits.
What is Google Analytics?
Google Analytics is a web tool by Google, that helps us in measuring, tracking, and analyzing different reports of visitors to our blog.
What are the Benefits of Google Analytics?
– It helps in tracking the Traffic.
– Analyze the location of your website visitors.
– Keywords drive traffic to your website.
– Pages your visitors are engaging more.
– Tracking the bounce rate of your website.
– Helps you in running targeted Ads campaigns, and much more.
So, these were some benefits of using Google Analytics, now let’s see how to can connect it with your website.
How to Add Google Analytics to WordPress Website
First, you need to create a Google Analytics property and then you will connect it to your WordPress website.
1. How to Create a Google Analytics Property Account
To create an analytics property account:
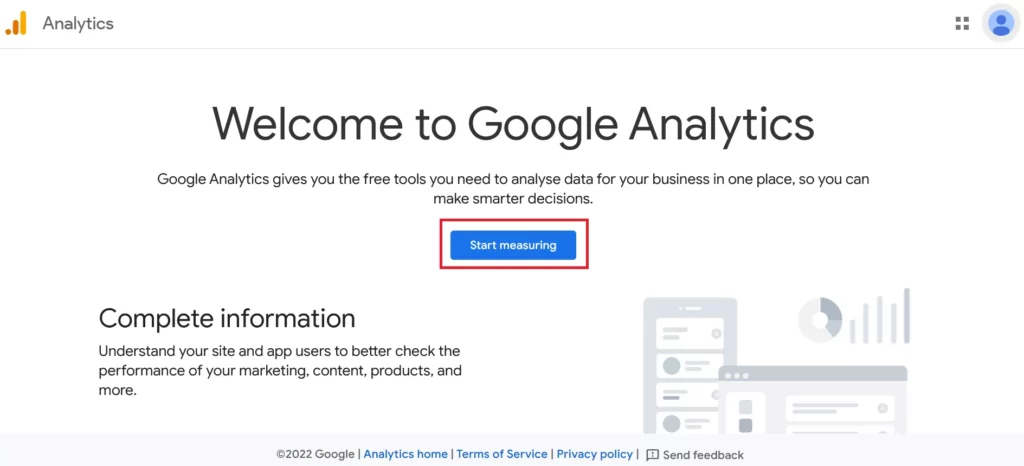
Step 1: Visit the Google Analytics website, sign in with your Google account, or create an account if you don’t have any.
Step 2: After logging in to your account click the “Start measuring” button.
Step 3: In the ‘Account Setup‘ section first enter your account name (website name).
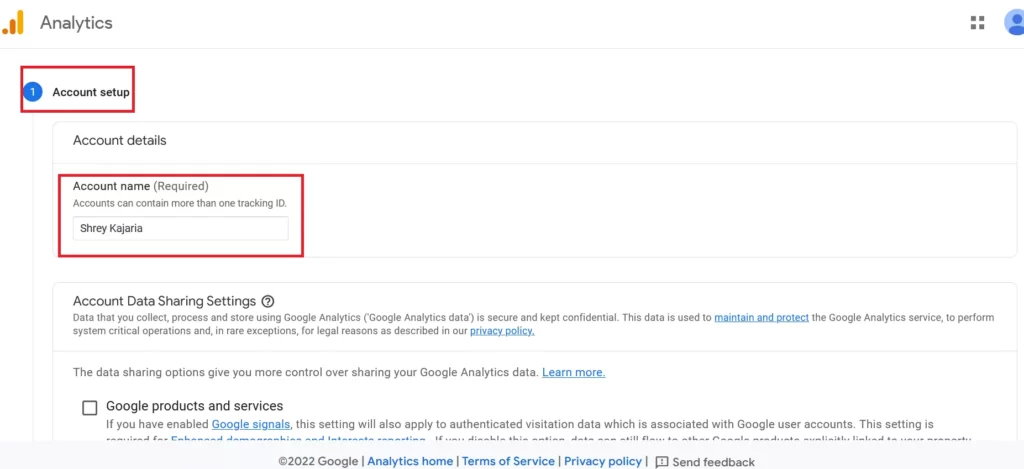
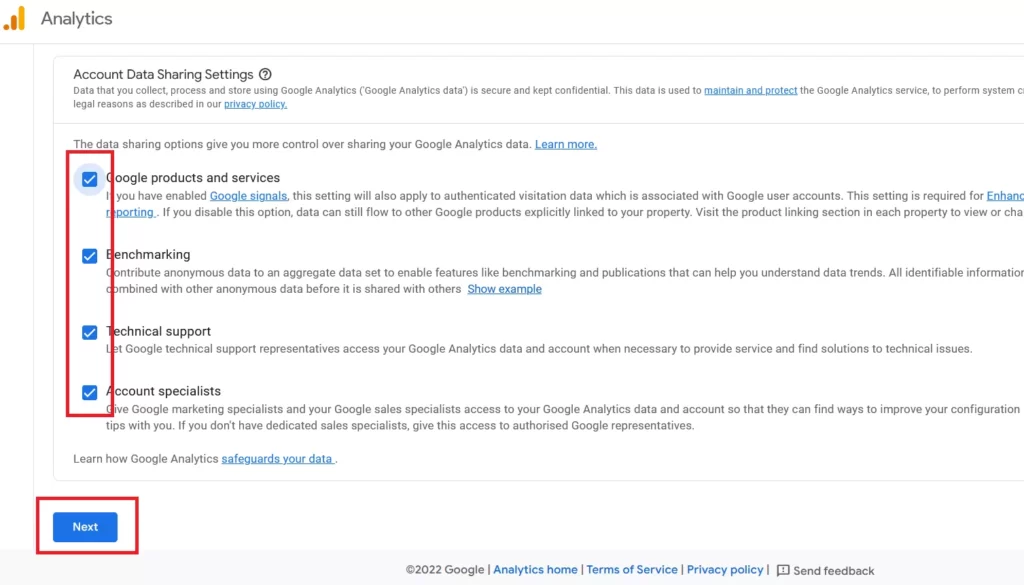
Step 4: Scroll down, in the ‘Account data sharing setting’, select the data you want to share, and click the “Next” button.
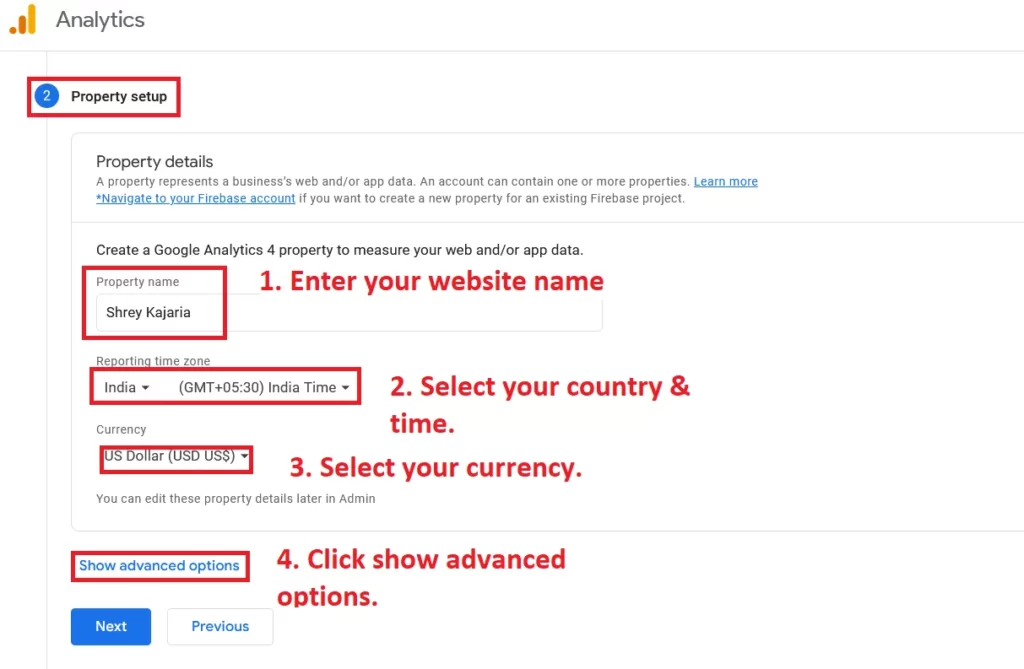
Step 5: In the ‘Property Setup‘ section first enter your property name (website name), then select your reporting time zone (country and time), then select your currency.
And if you want to know how to create a Universal Analytics property then click on the “Show advanced options” button.
In the advanced options settings, we will create a Universal Analytics property.
Step 6: Click on the toggle button on the right side, then enter your “Website URL” (domain name), then select the first option “Create both GA-4 and UA property” and then check the “Enable enhanced measuring” (If you want to create only GA-4 property then select the 2nd option) and click on “Next” button.

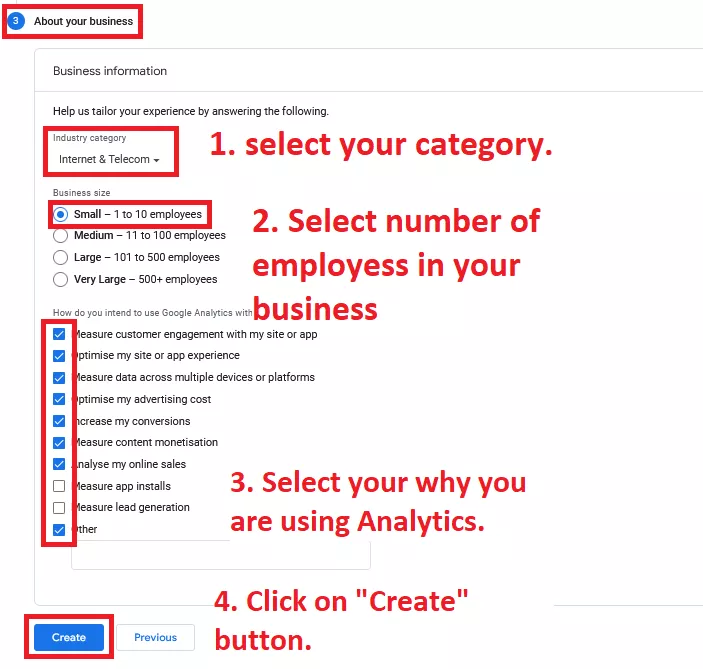
Step 7: In ‘About your business‘ select your website category, then select the number of employees in your business, select how you are using analytics, and then click the “Create” button.
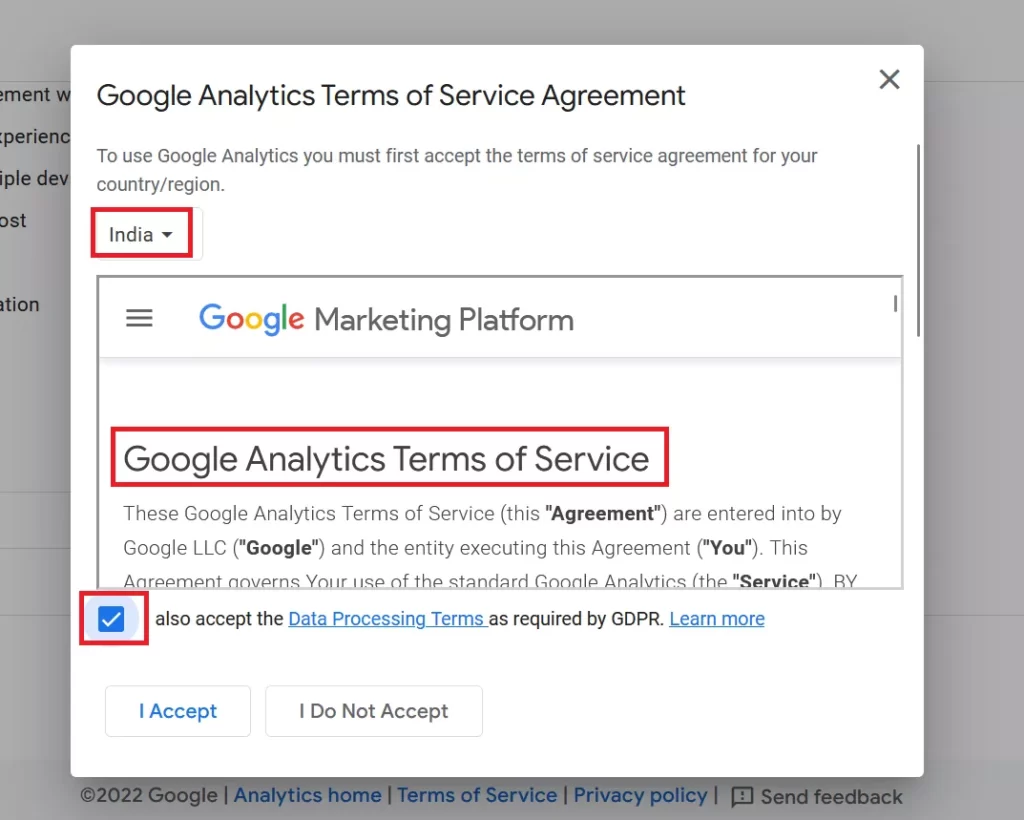
Step 8: Now you have to accept the Analytics agreements, so first select your “Country“, then click the check button to accept Analytics terms of service, and scroll down.
Step 9: After scrolling, you will see another agreement “Analytics Controller Data Protection Terms”, then click on the check button, and click the “I Accept” button.
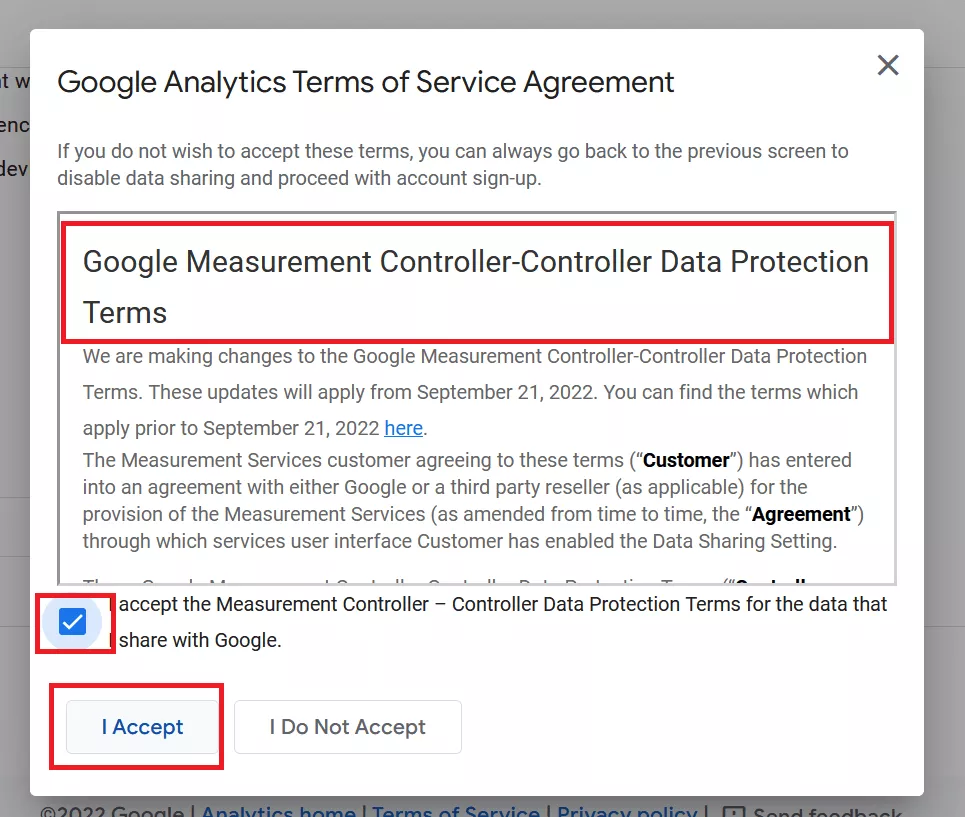
After that, your screen will load up and show a success message.
Step 10: After that, you will see a pop-up of email communications, if you would like to receive any emails regarding the mentioned data then you can select it and click on the “Save” button.

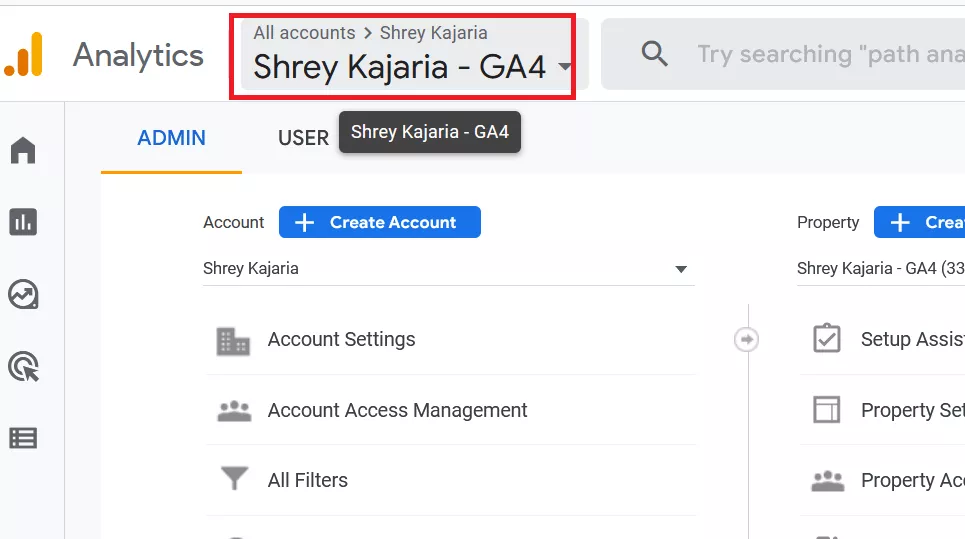
Alright, you have successfully created your Google Analytics property, Now you need to connect it to your WordPress website.
2. How to Connect Google Analytics Property to WordPress Website
Now, to connect your created analytics property with your WordPress website:
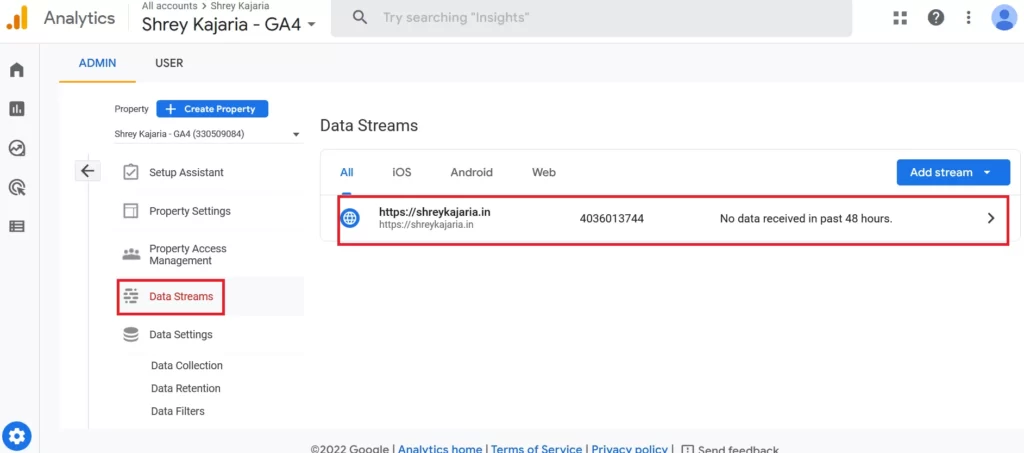
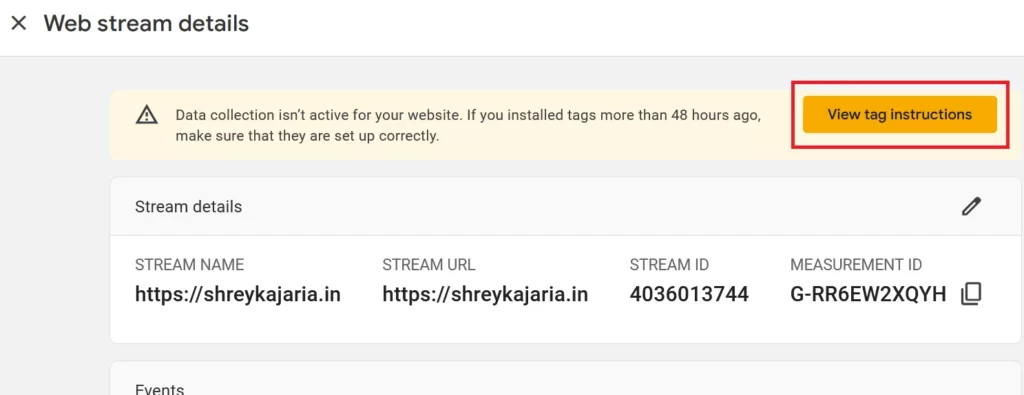
Step 1: After saving your email setting, you will see an option “Data Streams” on the left side menu click on it, and you will see a data stream on the right side, then choose and click on your data stream.
Step 2: After clicking on your data stream you will see your web stream details, and under it, you will see a button “View tagging instructions” option, just click on that.
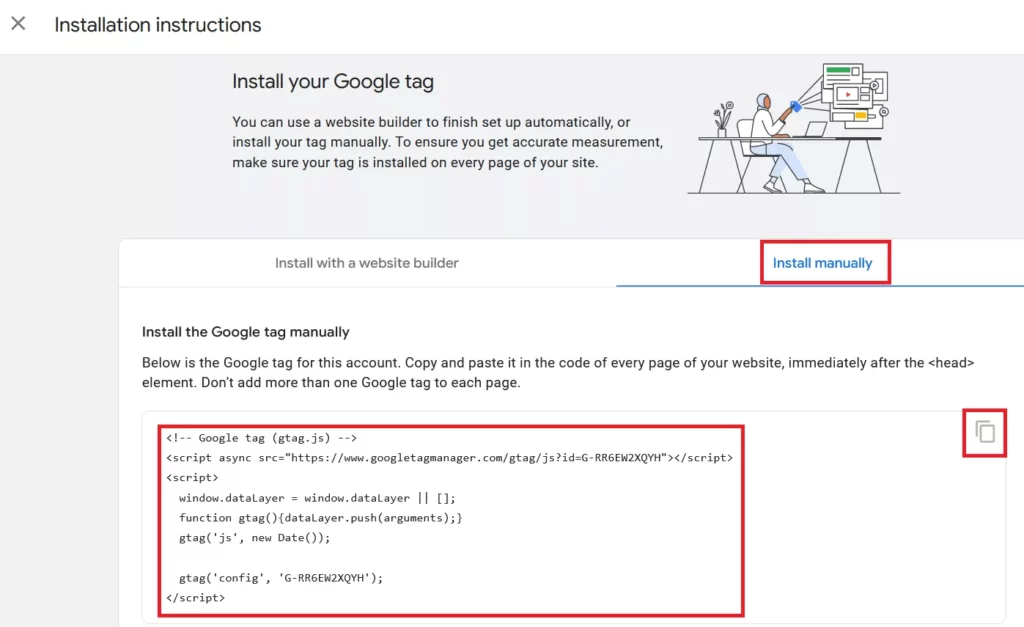
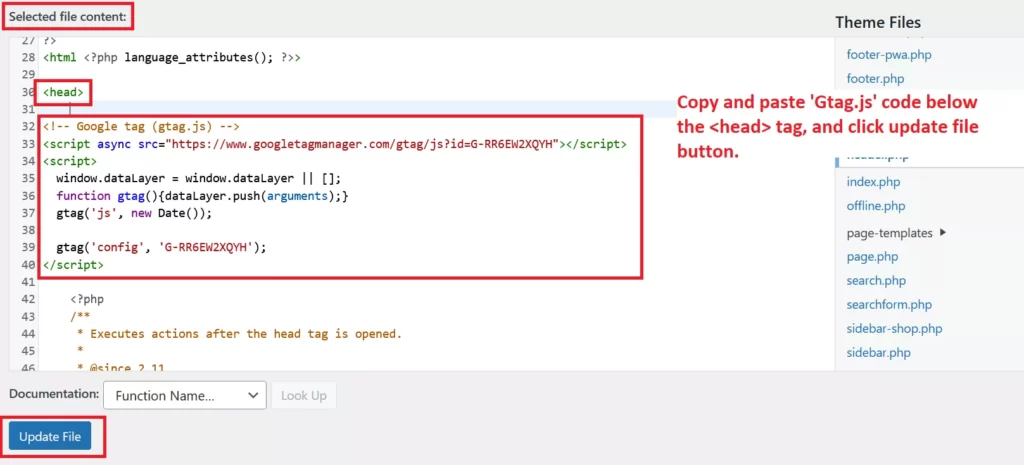
Step 3: Now you will see ‘Installation instructions‘ and under it, select the “Install manually” option then you will see a Gtag JS code that you need to copy and paste below the <head> section of your WordPress site.
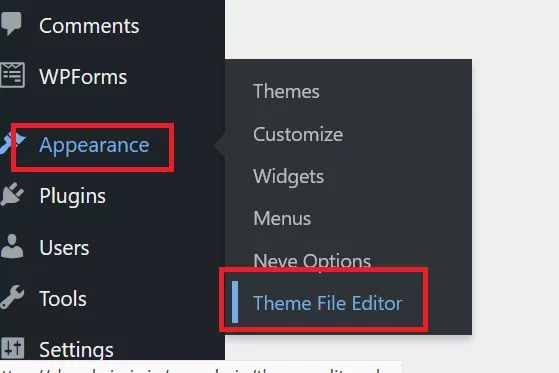
Step 4: Now log in to your WordPress dashboard, head to the Appearance tab, and select the Theme Editor option.
Note: If you see any warning pop-up then just select the “I understand” option.
Step 5: Then find and open the “header.php” file from the “Theme Files” options on the right side.
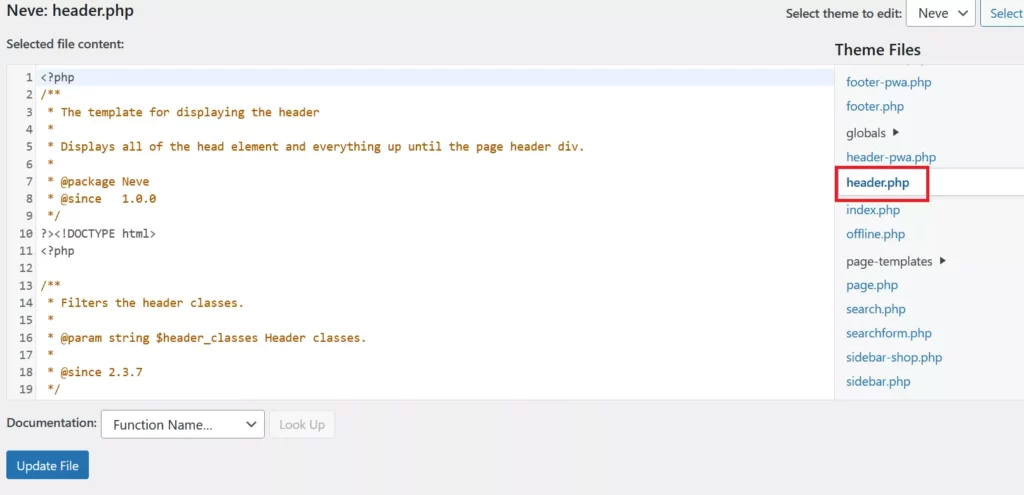
Step 6: Now go to your analytics tab and copy the “Gtag.js” code that you have seen in step 3, then come back to your WordPress, then find the <head> tag under the file content section, then paste that code below the <head> tag, and click the “Update file” button. You will see a dialogue “File edited successfully”.
So, you have successfully added Google analytics to your WordPress website.
Checking Whether Analytics Collecting the Data or Not
Now if you want to check whether it working collect the data from your site.
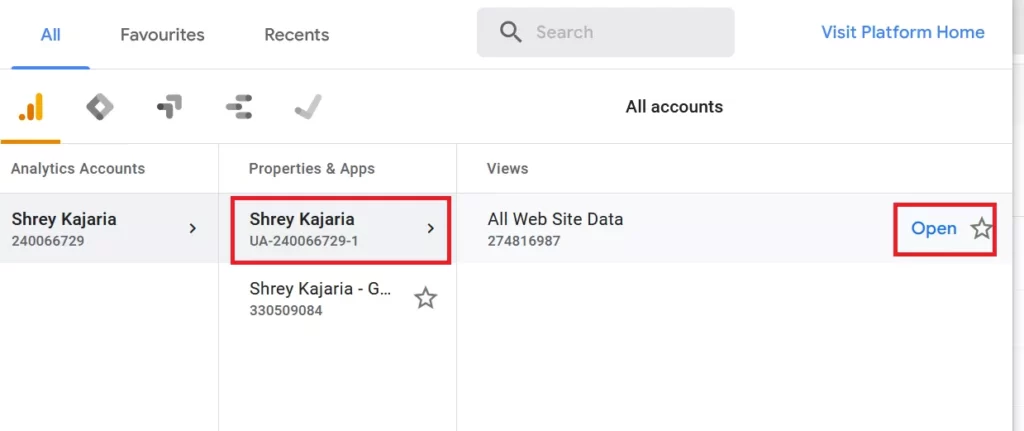
Step 1: Go back to the analytics tab and close all the open pop-ups then click on the “Accounts” tab on the right side of the Analytics logo at the top bar.
Step 2: Then select “UA property” from the properties & apps sections, and click on the “Open” button from the Views section.
Step 3: Now select the “Realtime” option from the left side menu option and then select the “Overview” option.

Step 4: Now open any page of your website in the “Incognito Tab/Private Tab” or on any other device, wait for 5 seconds and go back to the Analytics tab.

Now you will see that you have a live visitor (that is you) on your website.

Congratulations, This means your analytics is now successfully connected with your website and it’s collecting the data from your website too.
Final Words
So, I hope you followed this step-by-step guide and successfully connected Google Analytics to your WordPress website without any plugins.
If you found this helpful then don’t forget to share it with your blogger friends who want to connect their website to analytics and if you have any doubt related to it then feel free to comment below.
That’s all in this article, and all the very best.