If you want to know how to use Kadence AI to create a WordPress website quickly then don’t worry here is a step-by-step guide for you.
With this article, you will be able to create and launch your own desired WordPress website easily with Kadence AI.
From deciding colors, images, texts, layouts, and pages everything will be done by this AI-powered website designing tool.
So without any further talk let’s discuss What is Kadence AI first.
What is Kadence AI?
Kadence AI is an AI tool that allows users to create designs and layouts through its AI capabilities.
What Kadence AI offers/features:
Now let’s discuss step-by-step, how you can use Kadence AI to create your WordPress website.
First, you need to install the Kadence theme on your site, so for that, you can check out my guide on How to Install Kadence Pro Theme on WordPress Step-By-Step
How to Create a WordPress Website with Kadence AI
After you have installed the Kadence theme on your site, just follow this step-by-step guide to create a site with Kadence AI.
Step 1: Install & Activate Kadence AI Starter Templates

For that, you need to open your WordPress dashboard click on the “Appearance” tab, and then click on the Kadence option.

After that on the top, you will see the option “Install AI Starter Templates” just need to click on that.

Then you will see two options “Activate Kadence AI Starter Template” or “Use Classic Starter Template” so you need to click on the first option “Activate Kadence AI Starter Template“.
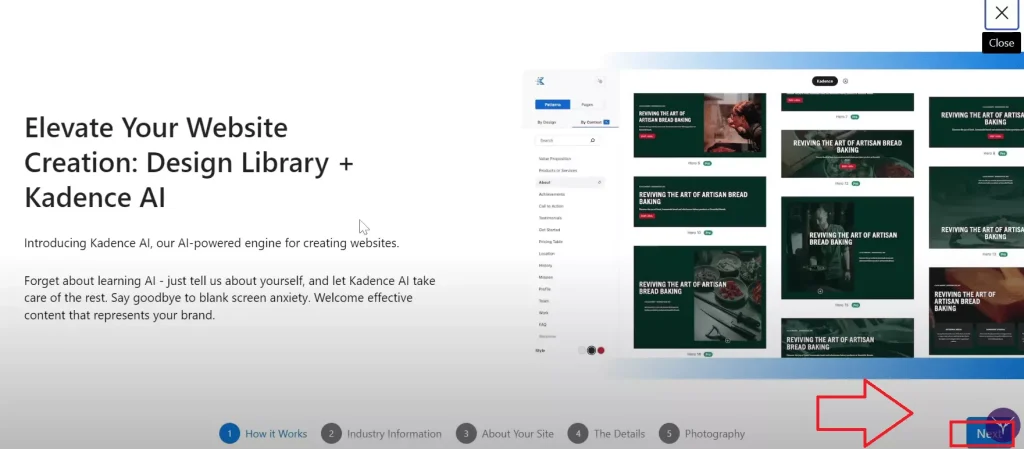
After activating the Kadence AI starter templates, you will see the start page of Kadence AI Wizard with some information about the tool, here you just need to click on the “Next” button at the bottom right corner.
Step 2: Enter Your Business Business Information in the AI Wizard
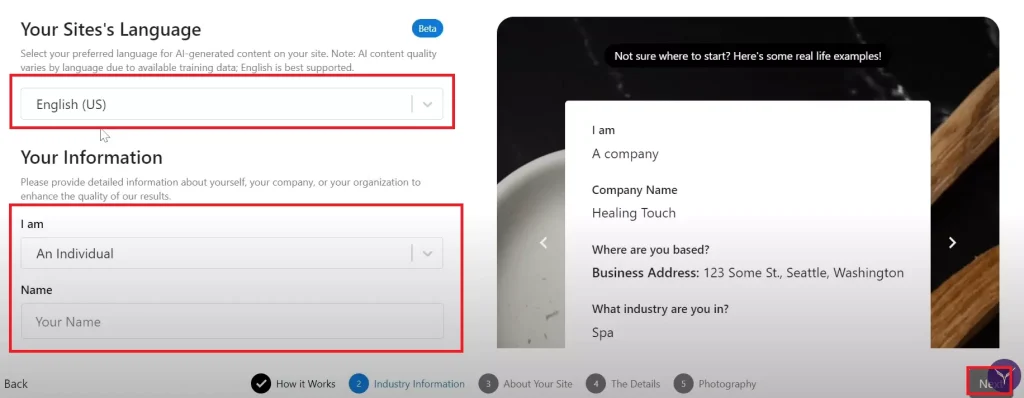
- First, you need to select the language in which your website will be.
- Then you need to select whether you are an individual or a company.
- After that, you need to enter your name or business name.
- Select where are you based, whether your business runs in a physical location, whether it’s an online store or the service area, and according to that the location of your business i.e. your business address.
- Then you need to select which industry you are in and simply click the “Next” button.
Step 3: Tell the AI About Your Business in the AI Wizard
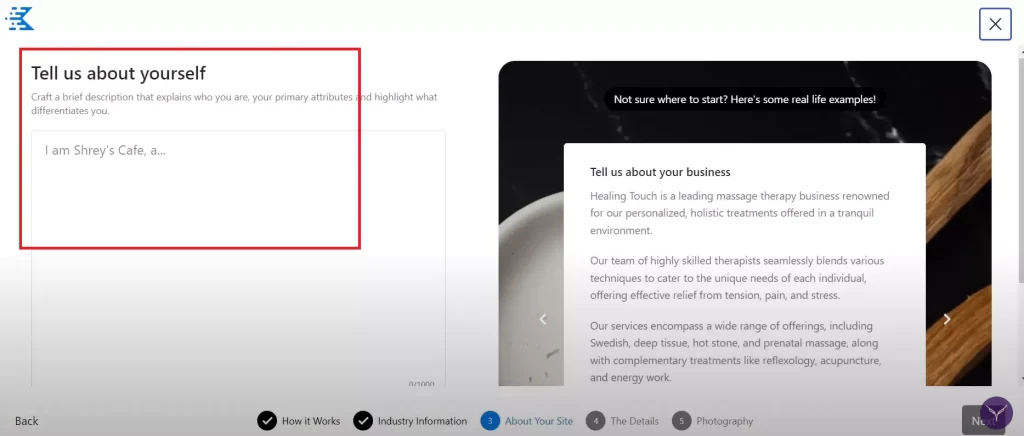
Now you need to write and tell the AI about your business, you can take ideas from the internet and write according to your business.
Here you need to enter more than 350 characters about your business so that the AI gets to know about it, so write everything about your business like what is it, your best services, why people chose you, the aim of your business, any specific highlights like uniqueness of your business, and etc.

After you enter around 350 characters you will see a new button “Improve with AI“, if you click on it the Kadence AI will create a paragraph for your business, just proofread it and make any changes if you want to.

Then hit the click on the “Use this Copy” button, then the “Next” button.
Step 4: Select the Best Keywords and Tone According to your Business
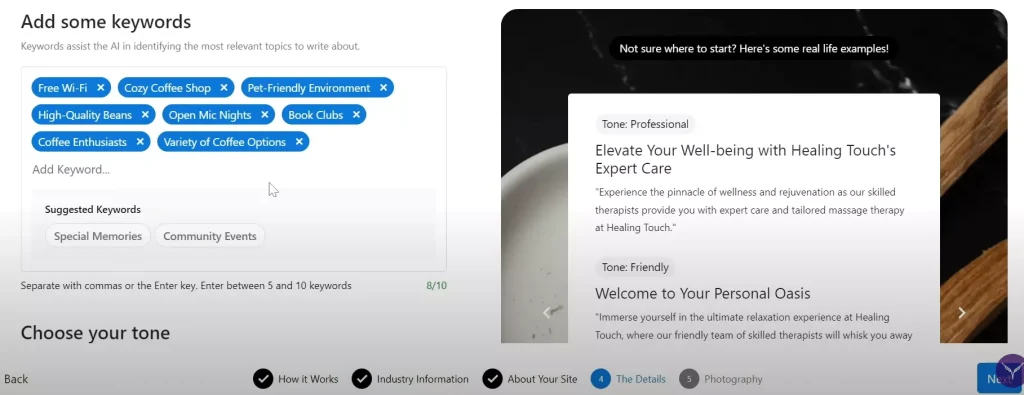
Now here you need to choose and select the best 5 to 10 keywords that fit your business, this will help your site to get optimized for SEO, so you can pick from the suggestions or write on your own.
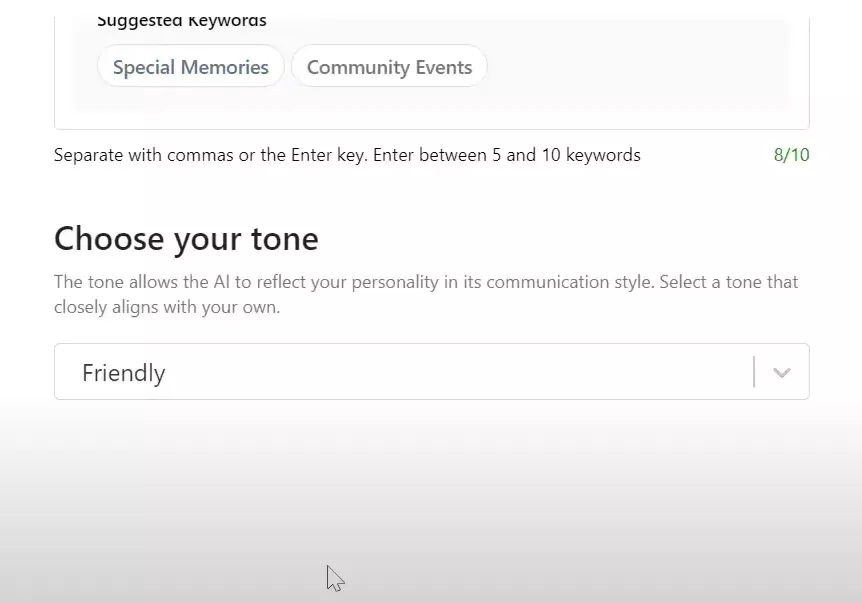
After that select the tone for your site, which means in which tone you want your site’s text copy to be, like friendly, neutral, formal, informative, conversational, etc. then just click the “Next” button.
Step 5: Now Select the Images for Your Site with the Help of AI
Here you will see two collections one for your site’s background and one for featured images.
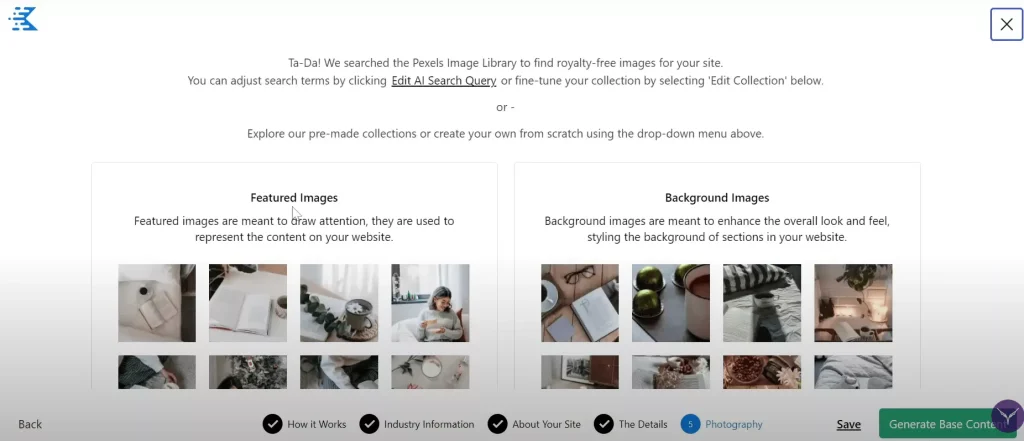
You can select or add images to that particular collection or create your new collection too, also you will see an option “Edit AI Search Query” where you can write which type of images you want for your site, then select the best one for you.
After you are satisfied with your image collection just click on the “Generate Base Content” button, so the AI will start to generate the content for your site according to the information you have provided, and this will take a couple of minutes.
Step 6: Select and Customize AI Starter Template
Step 6.1: Selecting the Starter Template
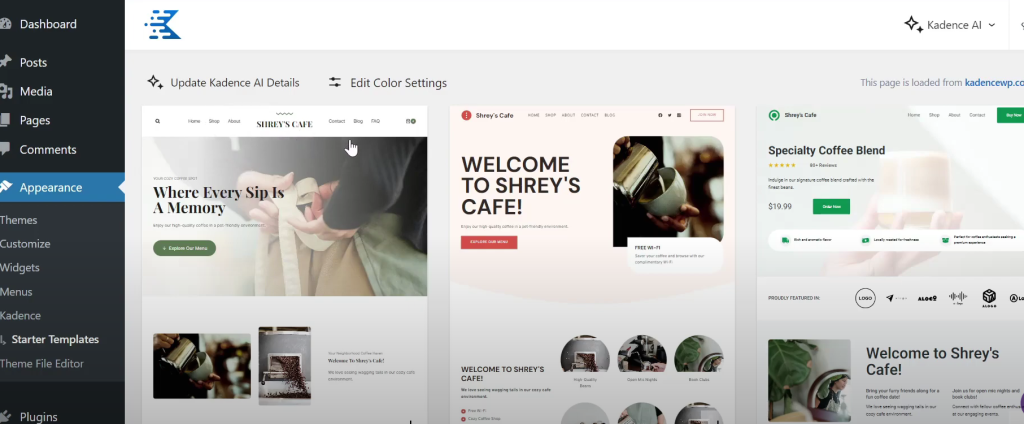
After the content generation is completed you will see some starter templates with the content of your website.
You can update the AI details that you have provided in previous steps by clicking the “Update Kadence AI Details” button also you can change the colors and font by clicking the “Edit Color Settings” button.
Then you can choose the best template you want by clicking on that template, also you can take a look at that template by hovering your mouse cursor.
Step 6.2: Customizing the Colors & Font
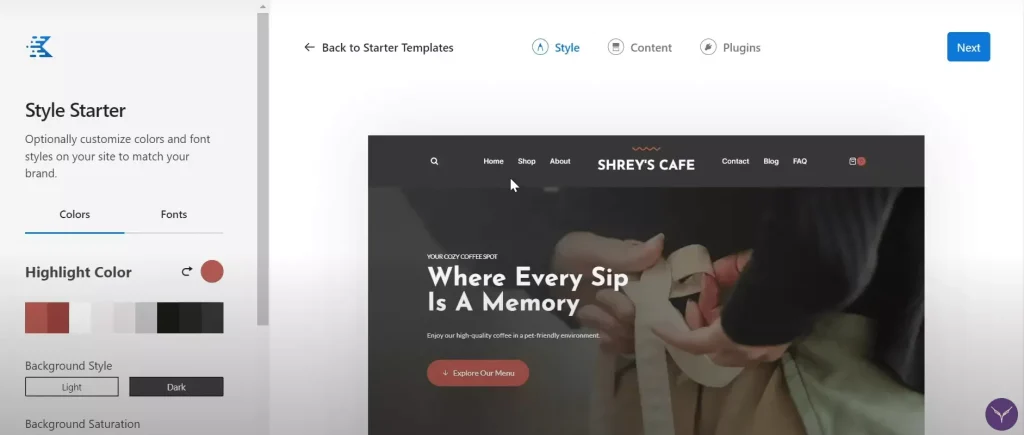
After you select any Kadence Starter Template, the next option will be Style Starter where you can change the colors and fonts of your site, which you can also do in Step 6.1. then click the Next button.
Step 6.3: Select the Content or Pages for Your Site

Now you can select which pages you want to display on your site by selecting them, also you will get the option to import example blog posts and WooCommerce products.
So if you want to import them turn on the toggle button near to it or turn it off if you don’t want to import. You can edit or delete them later too.
After that click on the Next button again.
Step 6.4: Select & Install Required Plugins for Your Site
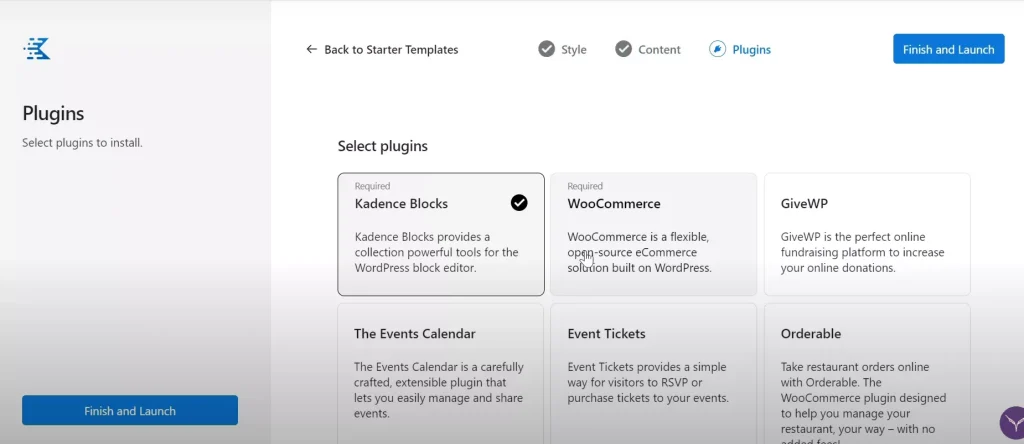
Now you need to install the required plugins, the Kadence Blocks need to be installed as it will create layouts and other blocks that are required for your site.
WooCommerce plugin if you have to showcase your products and allow visitors to purchase them.
Then select any other plugins that you want to be on your site and click on the “Finish And Launch” button.

After that, it will take a minute to create and launch your site.
And then you will see the option “See My Site“, so you can click on it and see your site’s look.
Step 7: Editing the Pages With AI-Powered Design Library
If you want to edit the content of the pages which is generated by the AI then you can simply edit those pages according to your needs.
But here is a game changer which is the Design library by the Kadence AI, you will get the pre-built layouts, designs, content, and much more for your site.

Just click the Design Library tab as shown in the above image.
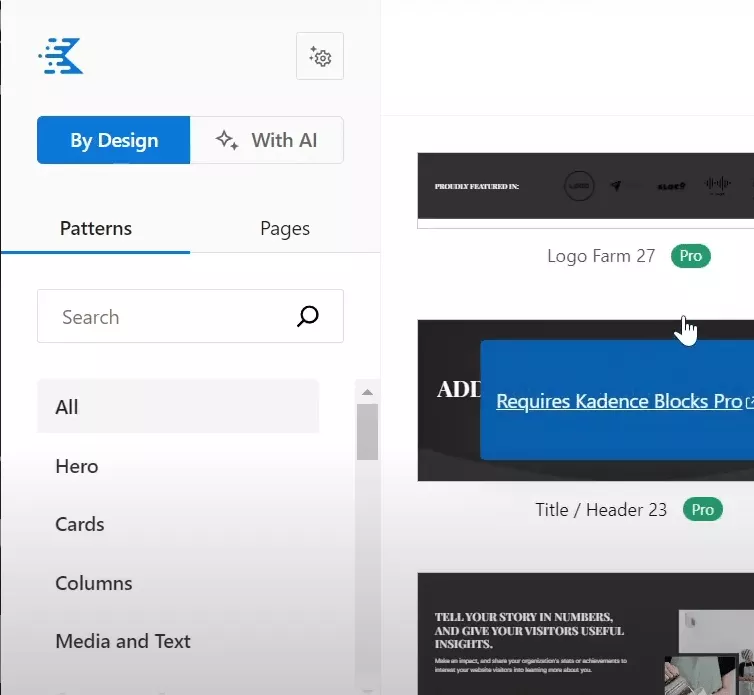
After that, you will see two options “By Design” and “With AI“, in the “By Design” tab you will see different layouts that you can use on your page.

But if you go to the “With AI” tab you will see those layouts with content and texts that you have given to the Kadence AI at the beginning of this tutorial.
So you can just select the layout that you want to add to your page and it’s good to go.
Also, you can update the AI details repeatedly for better results and edit the details like texts, colors, and fonts of the selected layout too.
Step 8: Improve the Texts with the In-Line AI Tool
This is one of the best features that you will is the Inline AI tool, as you may have written a lot of text on your pages and you might not be happy with it, so you can improve those texts with this Inline AI tool by the Kadence AI.

Simply click on the text you want to edit with this tool and then click on this double star type icon and you will see the edit options.
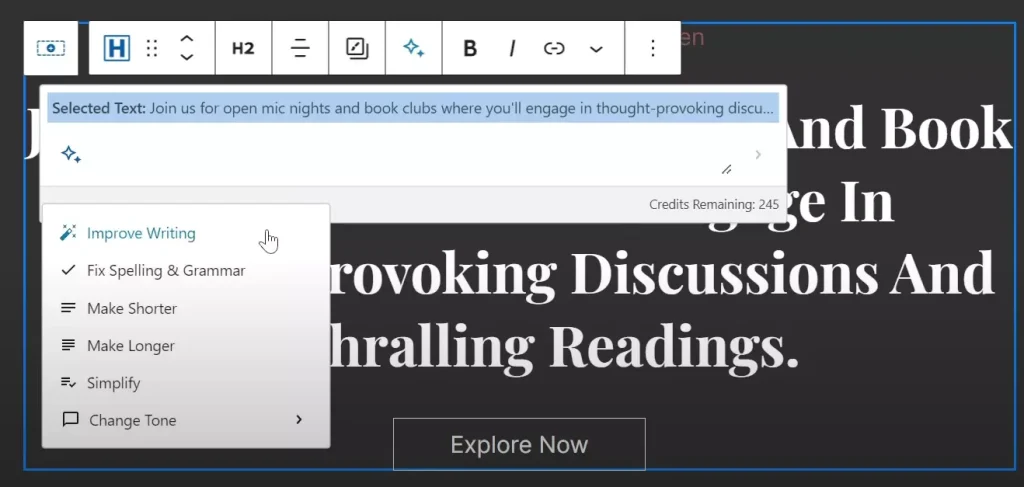
With this tool, you can:
So this might be helpful as well when you’re out of thoughts or creativity in writing.
Kadence AI makes it easy to create awesome websites with WordPress, even if you’re not a coding expert. It gives you cool features like AI Starter templates, AI-powered Design library, and Inline AI to make your site look great without much effort.
So, why wait? Give Kadence AI a try today! Make your WordPress experience even better and bring your website ideas to life without any hassle.
With Kadence AI, you can make websites that look awesome and grab people’s attention. Get ready to take your website design skills to the next level with Kadence AI!